
![]() have divided this assignment into three ‘projects’ each of which requires
a different subset of the skills necessary to complete this assignment.
have divided this assignment into three ‘projects’ each of which requires
a different subset of the skills necessary to complete this assignment.
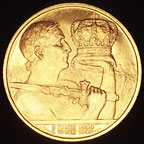
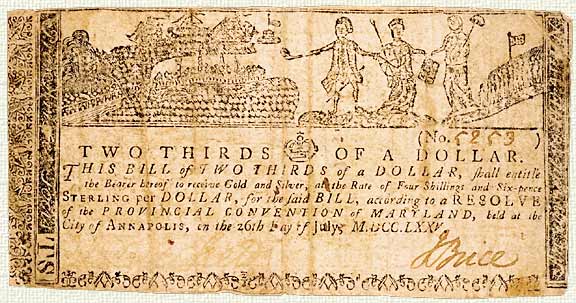
The first project is (predictably) a coin—one that has a particularly evocative representation of sovereignty on its obverse.
 |
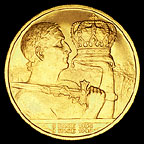 |
| Romanian gold 10 graben coin struck in 1940 to commemorate the 10th anniversary of the coronation of King Carol II. This coin has a particularly evocative image of sovereignty with the king holding a crown, the symbol of power, in one hand, and a sword, the means of power, in the other. |
To begin with, I photographed the coin using elite chrome 100 slide film. I used a Nikon LS–1000 35mm film scanner to scan the image at 500% and 300 dpi (a size I find convenient to work with as a master for most coins)—yielding a 4.5 mb file which was saved as a psd image with rgb color mapping. I then proceeded to work on the image using photoshop 7.
I began by balancing the image with levels, followed by selecting out the ‘hotspots’ (ie., highlights that had no tonal information at all) into a curves layer and adding some yellow tone to them. Next, I worked on the shadowed area above the head and crown to remove the blemishes and give a more even tone. This was accomplished using a curves layer for the shadowed area—first lightening the area slightly and then, using the healing tool and the clone stamp, removing the blemishes. The final step was to re-size the image, use the unsharp mask and then save it for the web.
![]()
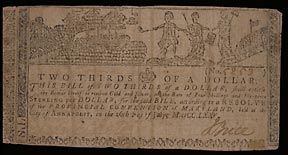 |
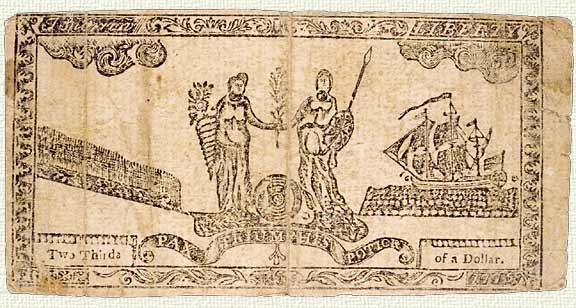
This image was chosen for its interesting combination of imagery and language, revealing the dilemma facing the provincial authorities on the eve of the American Revolution. | |
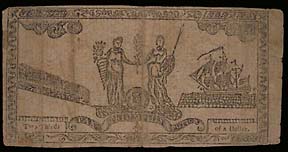 |
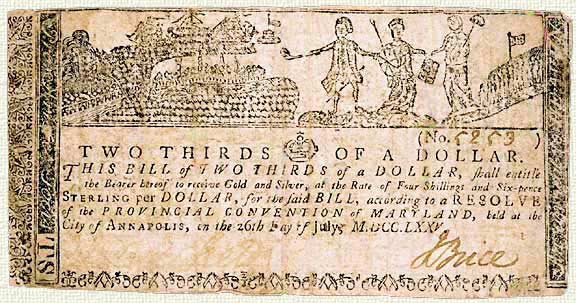
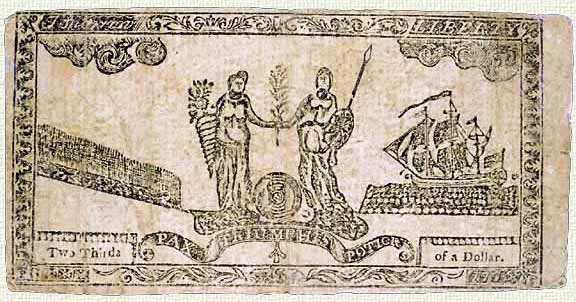
These images are from a commercially scanned photo cd—unfortunately, it is badly–scanned, a common problem in my experience. The first step in preparing the image was to use levels to balance the image, followed by a quick conversion to CMYK in order to increase the contrast of the black channel with the following results—front/back. The images are greatly improved, but there are still a few remaining problems, which are mainly the result of age and wear. The final results are as follows; front/back after working in the RGB channels and selecting the areas of wear and using curves on them, followed by the use of the clone stamp and the healing brush. I am not entirely happy with this method, as you have to be very careful not to totally destroy the color values inherent in the original image, plus you need to make sure that the areas retouched are done through all three channels—otherwise they will pick up a new color–cast all their own.
![]()
 |
 |
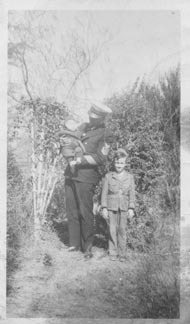
| This image is of my father, aunt, and grandfather in North Carolina, soemtime in 1942. My grandfather was in the Navy at the time (Soon afterwards he switched to the Merchant Marine). My father is wearing an Army Air Corps uniform. The original is a 4.5" x 2.75" black & white print . |
 This is one of the earliest images I have of my father, grandfather, and
aunt. Unfortunately, the image has suffered over the years—it is now badly
faded, has a large number of small cracks, and shows some signs of mold
damage. The project was quite challenging, especially because the original
image was fairly small (4.5" x 2.75"). I scanned the image as
a b&w photo with thousands of shades of gray at 200%. This yielded
a 7.42 mb tiff image, plenty big to work with and see any problems in
detail.
This is one of the earliest images I have of my father, grandfather, and
aunt. Unfortunately, the image has suffered over the years—it is now badly
faded, has a large number of small cracks, and shows some signs of mold
damage. The project was quite challenging, especially because the original
image was fairly small (4.5" x 2.75"). I scanned the image as
a b&w photo with thousands of shades of gray at 200%. This yielded
a 7.42 mb tiff image, plenty big to work with and see any problems in
detail.
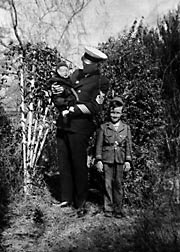
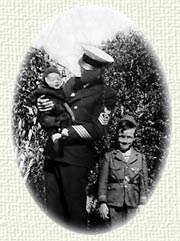
 This is my final version of this image—I have colorized it and removed
the distracting branches that were in the front of the figures. I left
the background in grayscale in order to emphasize the figures.
This is my final version of this image—I have colorized it and removed
the distracting branches that were in the front of the figures. I left
the background in grayscale in order to emphasize the figures.